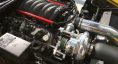
If you have a GEN5 Camaro with an automatic transmission then you are most likely familiar with the Active Fuel Management feature on the L99. For some drivers, they like the feature of 4 cylinders deactivating on the highway to save fuel. Others are annoyed at the exhaust drone and lack of performance. One popular performance upgrade is converting the L99 to LS3 Valve Train along with a custom camshaft. Some very significant power gains can be achieved.
There are several significant differences between the L99 and LS3 valve train. The LS3 uses a conventional roller camshaft, roller lifters and non-variable timing. The L99 has a variable timing camshaft, different lifters and front cover. Changing a camshaft on a LS3 is quite simple as it will slide out with the front cover removed and does not require the removal of the cylinder heads. On the L99 the cylinder heads must be removed to change out the lifters.
When installing a conventional LS3 roller camshaft into a L99 there are more components required and additional steps to complete the process. This article is going to show the process along with some additional upgrades that can be done.
The main steps of Segment 1 are:
- Engine Removal
- Engine Disassembly
- Engine Cleaning
- Engine Painting
- Oil Pan and Cooler Assembly
This LS3 conversion can be completed without removing the engine. However, once the engine is broken down to a short block it is not much more work to remove it entirely. With the engine out and on a stand it is much easier to work on. The front cover, valve train, and oil pan are removed.


With the oil pan removed, I cleaned it up and painted it with a durable Black Crinkle paint. On the inside, I replaced the stock baffle with a performance unit from Improved Racing. This will ensure constant oil at the pick-up during extreme driving conditions.


Next, I moved onto making the oil cooler look a little better. I disassembled it and replaced all of the seals. Then it was painted and bolted to the pan using ARP 12pt stainless bolts. Polishing the coolant pipe from the cooler to the block makes a big difference.


With the engine block cleaned and masked off for paint I gave it several coats of Chevy Orange.

Once the engine paint was dry I removed all of the masking tape and cleaned off any excess residue. One thing I highly recommend to anyone installing a new camshaft is to replace the timing chain, regardless of mileage. An upgraded chain is available from Iwis at a very reasonable price. Replacing the timing chain does require removing the oil pump. If you are doing this project with the engine in the car it is possible. You will need to remove all of the oil pan bolts and let the pan rest on the frame. Then the oil pump pick-up can be removed from the pump. With the four bolts removed the oil pump will slide off the crank. Then the new timing chain can be set in place.

With the new chain installed the oil pump can be re-installed onto the crankshaft. Then the oil pump pick-up is put into place. It bolts to 2 main cap studs and then to the oil pump. It is necessary to replace the O-Ring on the pick-up tube. Apply a generous amount of engine assembly lube to ensure a perfect seal.

With the pick-up tube installed, now the oil pan can be set into place. I replaced the original oil pan gasket with a new piece from GM. It is riveted onto the pan so there is no room for error. I used a few small dabs of RTV on the corners where the pan meets the front and rear cover to prevent any oil leaks. Once in place, I bolted it down using all ARP bolts.


Stay tuned for Segment 2 which will cover the cylinder head machining and assembly.